In this post I will explain the need and the use case of Data Science platform, which can be deployed to Azure cloud in one lazy afternoon. Many tutorials focus on one element or technology, making you to piece the information together in order to come up with a full architecture. My goal is to provide a quick and very simple setup for testing purposes from the beginning to the end.
The bitter sweet story
You are the owner of a very successful chain of ice-cream shops. The business is booming, because you are awesome! You have 1000 ice-cream shops all over country, plus you’ve just sold your brand name rights to few other countries. Apart from melty goodness you are also a bit obsessed with IOT (Internet of Things) technology, so every shop you own is filled with sensors, cameras and raspberry pi devices. You also store additional data from sales, marketing and review pages.

Your business is generating huge amount of data, which could bring benefit by providing valuable insights. Driven by that idea you hire a small team of bright data scientists, hoping that the power of Data Science and Machine learning will double your sales in the following months.

Why cloud?
But wait. Oh no. Your team comes back to you after few weeks with bad news. They were able to brainstorm many ideas around your data. They created the initial scripts, did the feature engineering, tested models on a small datasets and even managed to produce valid results. Hell, they even developed one Deep Learning model using video from cameras (you now can put “AI” to your powerpoint slides). But then they hit computing resource wall. There is simply too much data for any laptop to process. They thought about buying well specked computer with a lot of RAM and few GPU’s, but they already bought expensive Macbooks and ran out of budget. Plus - one powerful machine is not an option as it is hard to collaborate on one machine, maintain and deploy models.

And then it hit you - cloud computing. In theory - the cloud could solve all of your problems. Almost unlimited and fast resource scaling, collaborative environment, simple and always accessible tools, on demand computing power (which saves money in the long run). There is only one question left - what resources do we need in the cloud and how to set it up? And that’s where this blog post comes into play.

Technical flavor
First of all - we have to select our cloud provider. Today I am mainly focusing on Azure stack. For the sake of tutorial - almost every step can be reproduced by registering free new Azure account, which grants you $200 dollar budged for 30 days.
Small disclaimer - when writing this post I realized that not every step of the process can be achieved using free Azure tier subscription. For Databricks cluster, we will need at least 8 CPU cores which is not supported by free tier subscription. In order to follow the steps in the process you will need to set up pay-as-you-go account. More information in the first note here.
When we decided on our cloud flavor it’s time to move to our toppings - elements that will form the Data Science platform.
Choosing your toppings
For our brand new Data Science Platform we need three main components:
- Power processing service - to run our code, train our models, save the results. Basically anything code related. This is our main tool for any data related task.
- Scheduling and orchestration service - as our codebase grows we need a tool to run and monitor our scripts. We would also like to have fully automated pipeline which would run on regular schedule.
- Data storage unit - data, results and trained model storage.
The corresponding services in Azure is displayed in the picture:
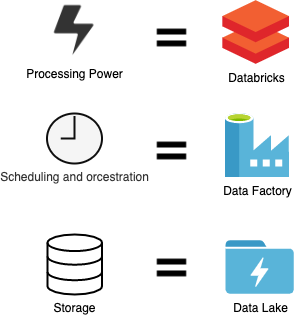
For running the code - Databricks will be used. It provides a Jupyter-like notebook environment to run Python, Scala, R or SQL code on the cloud. Databricks has a full Spark (distributed computing system) support, it provides an option to execute code on various size clusters. Databricks is not a Microsoft product, but it fully supports Azure and AWS components. For orchestration and scheduling we will use Data Factory, which has a nice graphical (drag and drop) user interface to schedule and run activities (Databricks notebooks, SQL scripts, copy data activity and etc.). For our storage we will use Azure Data Lake GEN2.
We now have our plan put together and we are ready to move to it’s execution!
Technical process
Setting up the platform in Azure can be achieved in various ways. The easiest solution would be to use web GUI and set everything manually. We will try to achieve everything in more automated kind of way - using Powershell and Azure API. Following this, we will have total control over our setup and the platform can be redeployed multiple times. In case new team gets established, the same setup can be deployed within minutes. We will try to do everything in the simplest way possible, which means the setup I will show is no way ready for production. Consider it as a proof of concept, which can pave a way for further development. First step in our process - Azure account creation.
Component deployment
First of all we need to set up our Azure account.
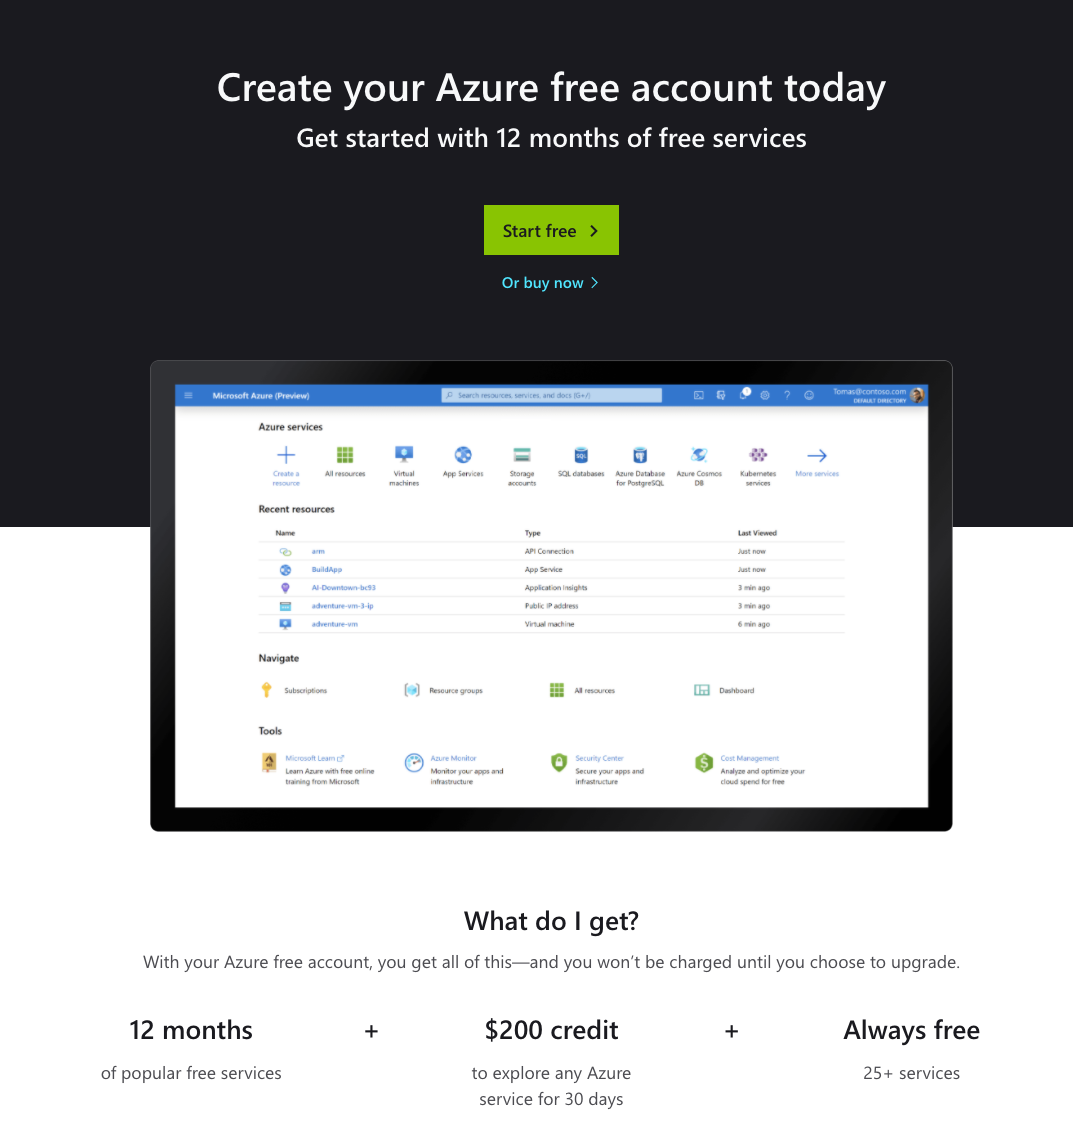
After registration we are greeted with the landing page. Welcome to Azure!
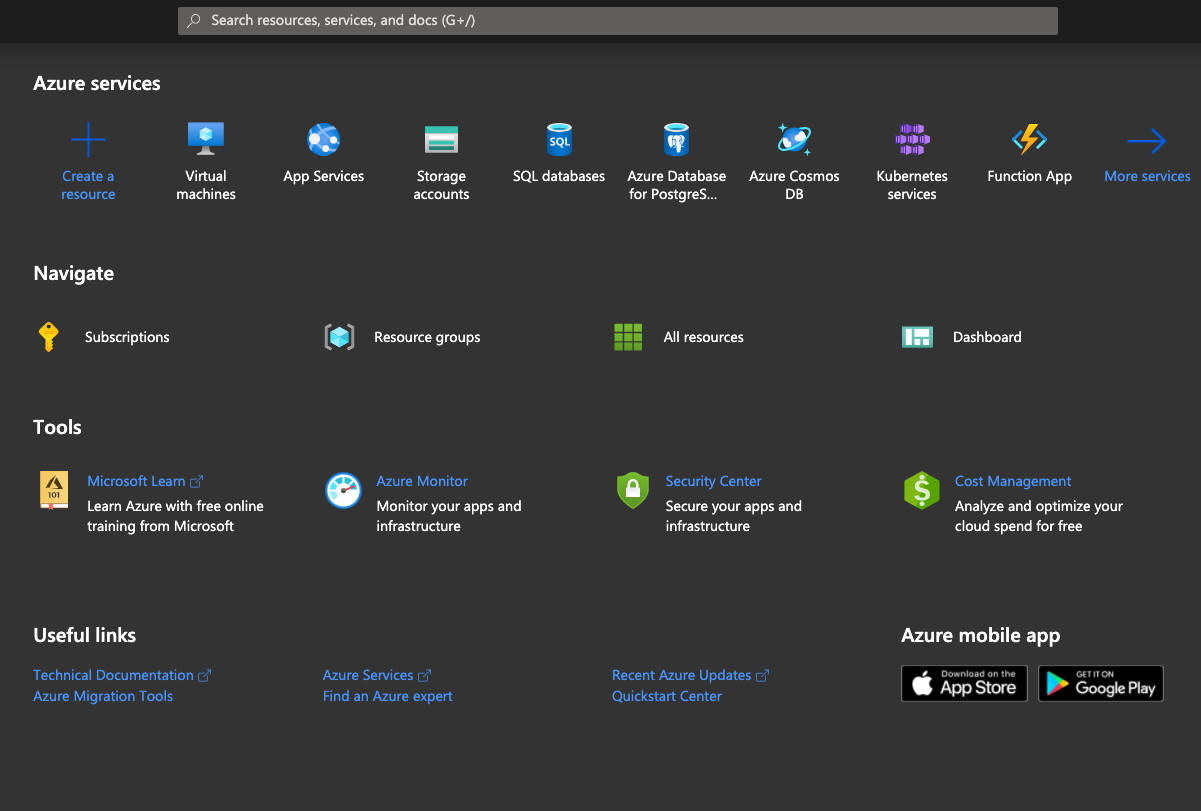
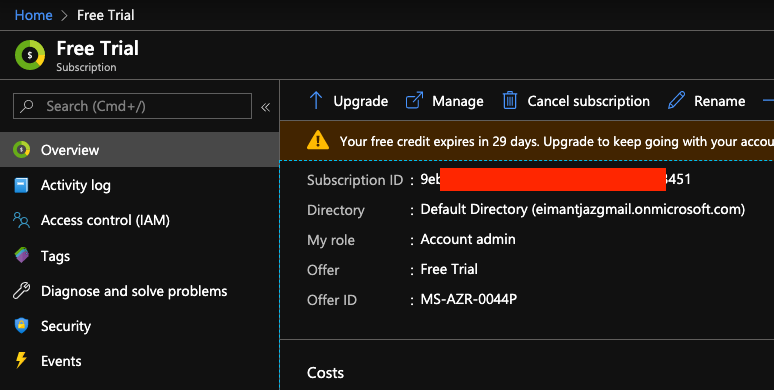
First thing we need to do - get the subscription id. Go to Subscriptions-> Free tier -> Overview -> Subscription ID. This will be used in our powershell scripts in order to determine the subscription we are deploying to.
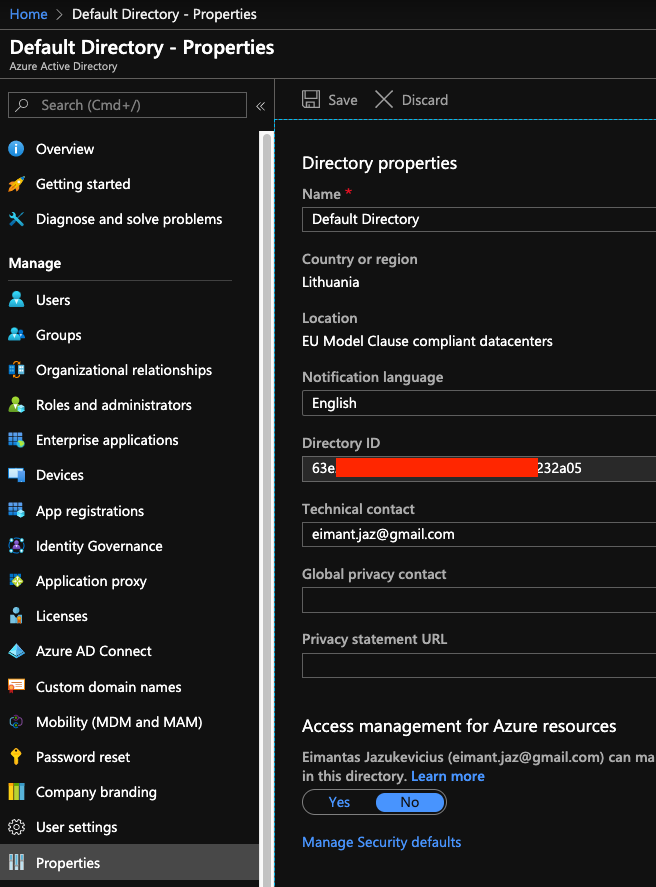
Second thing we need is our tenant id. This can be found in Azure active directory under Properties tab (tenant id is the same as directory id).
It’s time to write some code! All code used in this project can be found here. Your will need powershell with Az module installed.
As I am using powershell core on mac, the first step is to set up service principal for our deployment (windows users can use username/password login option). service principal is an identity used for application accesses. This can be done by running the one-timers/create-one-time-sp.ps1 script:
Import-Module Az.Resources # Imports the PSADPasswordCredential object

Connect-AzAccount

$ServicePrincipalName = "dsp-quick-sp"

$credentials = `
New-Object Microsoft.Azure.Commands.ActiveDirectory.PSADPasswordCredential `
-Property @{StartDate=Get-Date; EndDate=Get-Date -Year 2024; Password = "password"}

New-AzAdServicePrincipal -DisplayName $ServicePrincipalName `
 -PasswordCredential $credentials
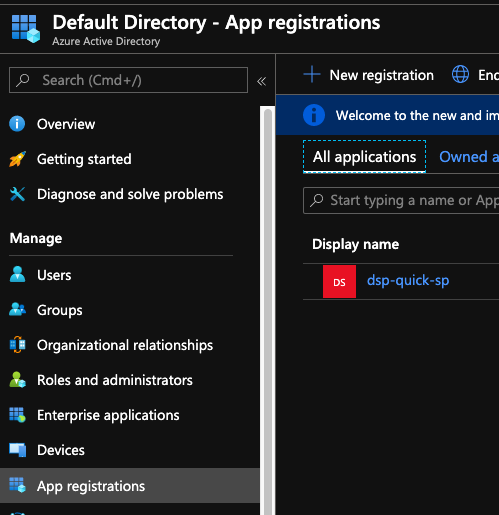
When you run this script, you will be asked to enter code from shell to the url provided. After that the service principal with password will be created (don’t forget to change “password” to something more meaningful). Service principals can be found in the same Azure active directory under App registrations tab. Save application Id as we will need it in a few minutes.
Next - we need to give proper access rights for our service principal. Navigate to Subscriptions -> Free Trial -> Access control (IAM) -> Role assignments -> Add and add our newly created service principal.

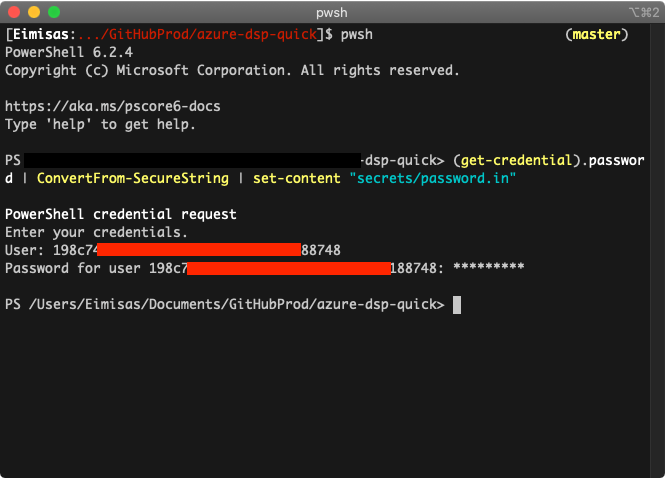
For security reasons we don’t want to store everything in plain text. Let’s encrypt our service principal password and store it in file. To achieve that run the following command in powershell terminal (with the location for the encrypted file):
(get-credential).password | ConvertFrom-SecureString | set-content "<location>"
Enter your service principal application id and password.
You have your encrypted password file ready! We are now ready to move to component deployment. It is always more convenient to keep all our parameters and names inside one config file. Our deployment parameters.json file will look like this:
{
    "SubscriptionId": "<<<Subscription ID>>>",
    "TenantId":"<<<Tenant or Directory ID>>>",
    "ResourceGroupName": "simple-dsp-rg",
    "AzAppId": "<<<service principal ID>>>",
    "Location": "West Europe",
    "Databricks": {
        "name": "simple-dsp-dbr",
        "pricintTier": "standard"
    },
    "DataFactory":{
        "name": "simple-dsp-adf"
    },
    "Storage":{
        "name": "simpledspstorage",
        "skuName": "Standard_RAGRS",
        "kind": "StorageV2"
    }
}
We will use parameters file for our main deploy.ps1 script. We read the parameters, connect to azure account, create new resource group and then deploy our three main components - databricks workspace, data factory and storage account:
Import-Module $PSScriptRoot\connect-account.ps1
Import-Module $PSScriptRoot\dsp-components.psm1

## Get the parameters
$param = Get-Content `
 "$PSScriptRoot\parameters.json" | Out-String | ConvertFrom-Json

## Connect Az account with service principal
$Null = Connect-Account -AzAppId $param.AzAppId -TenantId $param.TenantId `
 -SubscriptionId $param.SubscriptionId

## Create New Resource Group
$Null = New-Rg -Name $param.ResourceGroupName -Location $param.Location

# Create New Databricks workspace
New-Databricks -WorkspaceName $param.Databricks.name `
    -PricingTier $param.Databricks.pricintTier `
    -Location $param.Location `
    -RgName $param.ResourceGroupName

# Create New Data Factory
New-DataFactory -RgName $param.ResourceGroupName `
    -Location $param.Location `
    -DataFactoryName $param.DataFactory.name

## Create New Storage
New-Storage -RgName $param.ResourceGroupName `
    -StorageName $param.Storage.name `
    -Location $param.Location `
    -SkuName $param.Storage.skuName `
    -Kind $param.Storage.kind
Connect-account module looks like this:
Import-Module Az.Resources

function Connect-Account($AzAppId, $TenantId, $SubscriptionId) {
    #Get encrypted password
    $password = Get-Content `
     "$PSScriptRoot/secrets/pass.in" | ConvertTo-SecureString

    #Create new credential object
    $psCred = New-Object `
     System.Management.Automation.PSCredential($AzAppId , $password)

    #Connect to Azure
    $Null = Connect-AzAccount -Credential $psCred `
     -TenantId $TenantId  -ServicePrincipal

    #Set subscription context
    $Null = Set-AzContext -SubscriptionId $SubscriptionId
}
Dsp-components script handles most of the heavy lifting. Data factory and storage account is deployed using Azure powershell API. For databricks workspace we use ARM template in templates/databricks.json and deploy it as a template file:
function New-Rg ($Name, $Location) {
    Write-Host "Trying to create Resource Group ($Name)"
    $rg = Get-AzResourceGroup -Name $Name -ErrorVariable notPresent `
     -ErrorAction SilentlyContinue
    if ($rg) {
        Write-Host "Resource Group ($Name) already exists"
        return $False
    }
    else {
        $Null = New-AzResourceGroup -Name $Name -Location $Location
        return $True
    }
}

function New-Databricks($WorkspaceName, $PricingTier, $Location, $RgName) {
    Write-Host "Deploying databricks workspace ($WorkspaceName)"
    $Null = New-AzResourceGroupDeployment -ResourceGroupName $RgName `
    -workspaceName $WorkspaceName `
    -pricingTier $PricingTier `
    -location $Location `
    -TemplateFile "$PSScriptRoot/templates/databricks.json"
    Write-Host "Databricks workspace ($WorkspaceName) deployed"
}

function New-DataFactory($RgName, $Location, $DataFactoryName) {
    Write-Host "Creating Azure Data Factory ($DataFactoryName)"
    $Null = Set-AzDataFactoryV2 -ResourceGroupName $RgName `
        -Location $Location -Name $DataFactoryName
    Write-Host "Azure Data Factory ($DataFactoryName) deployed"
}

function New-Storage($RgName, $StorageName, $Location, $SkuName, $Kind) {
    Write-Host "Creating storage ($StorageName)"
    $Null = New-AzStorageAccount -ResourceGroupName $RgName `
        -Name $StorageName `
        -Location $Location `
        -SkuName $SkuName `
        -Kind $Kind `
        -EnableHierarchicalNamespace $true
    Write-Host "Storage ($StorageName) deployed"
}

Export-ModuleMember -Function "New-*"
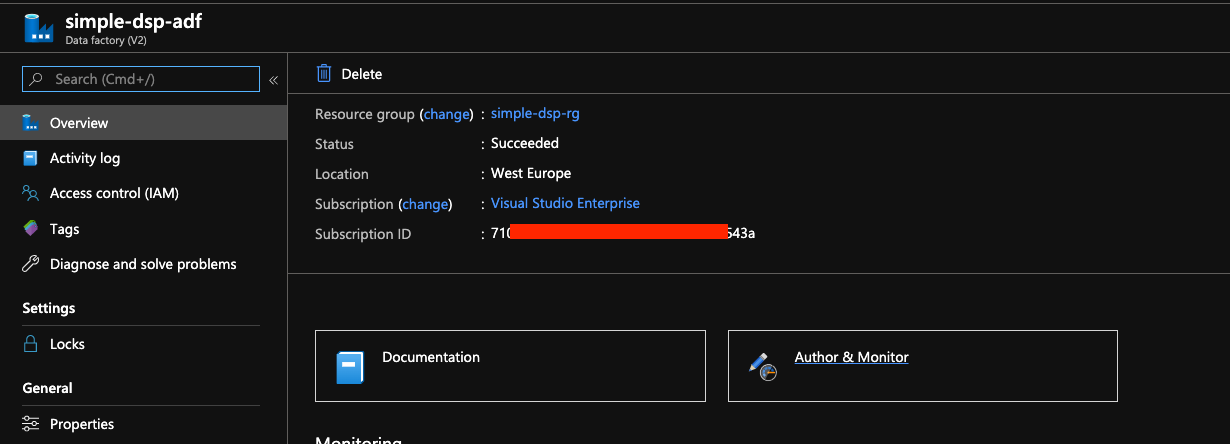
After we run deploy.ps1 scrip we hopefully end up with the view like this:
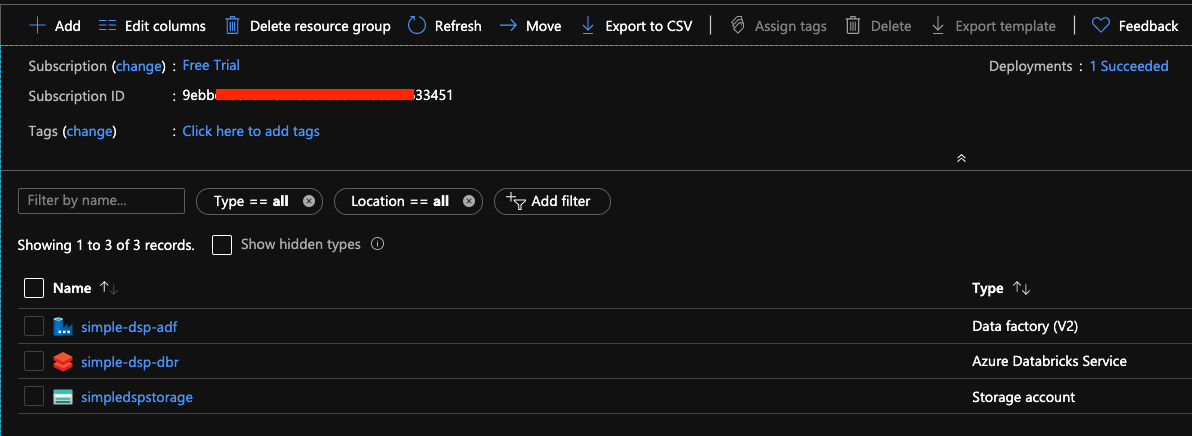
We have deployed every component needed for our data science platform. In the next section we will upload our data manually to the storage account, then we will connect it to Databricks environment from which we will read the data. We will also schedule our small pipeline to run in data factory.
A bit more mouse clicking
After the deployment we are ready to test our components. There are few more things we need to set up in order to have a fully functioning system. First - we need to load the data into our data lake. There are many ways you can do that using Azure Data Factory or Apache Sqoop. Again, for the sake of simplicity we will use Azure Storage Explorer with which you can browse the data lake directories and load the test file manually. I loaded the data file from Keggle after a quick google search.
Once our file is in place it’s time to open the Databricks workspace, create the cluster and mount the storage. Go to the Databricks resource and press the “Launch workspace” button.
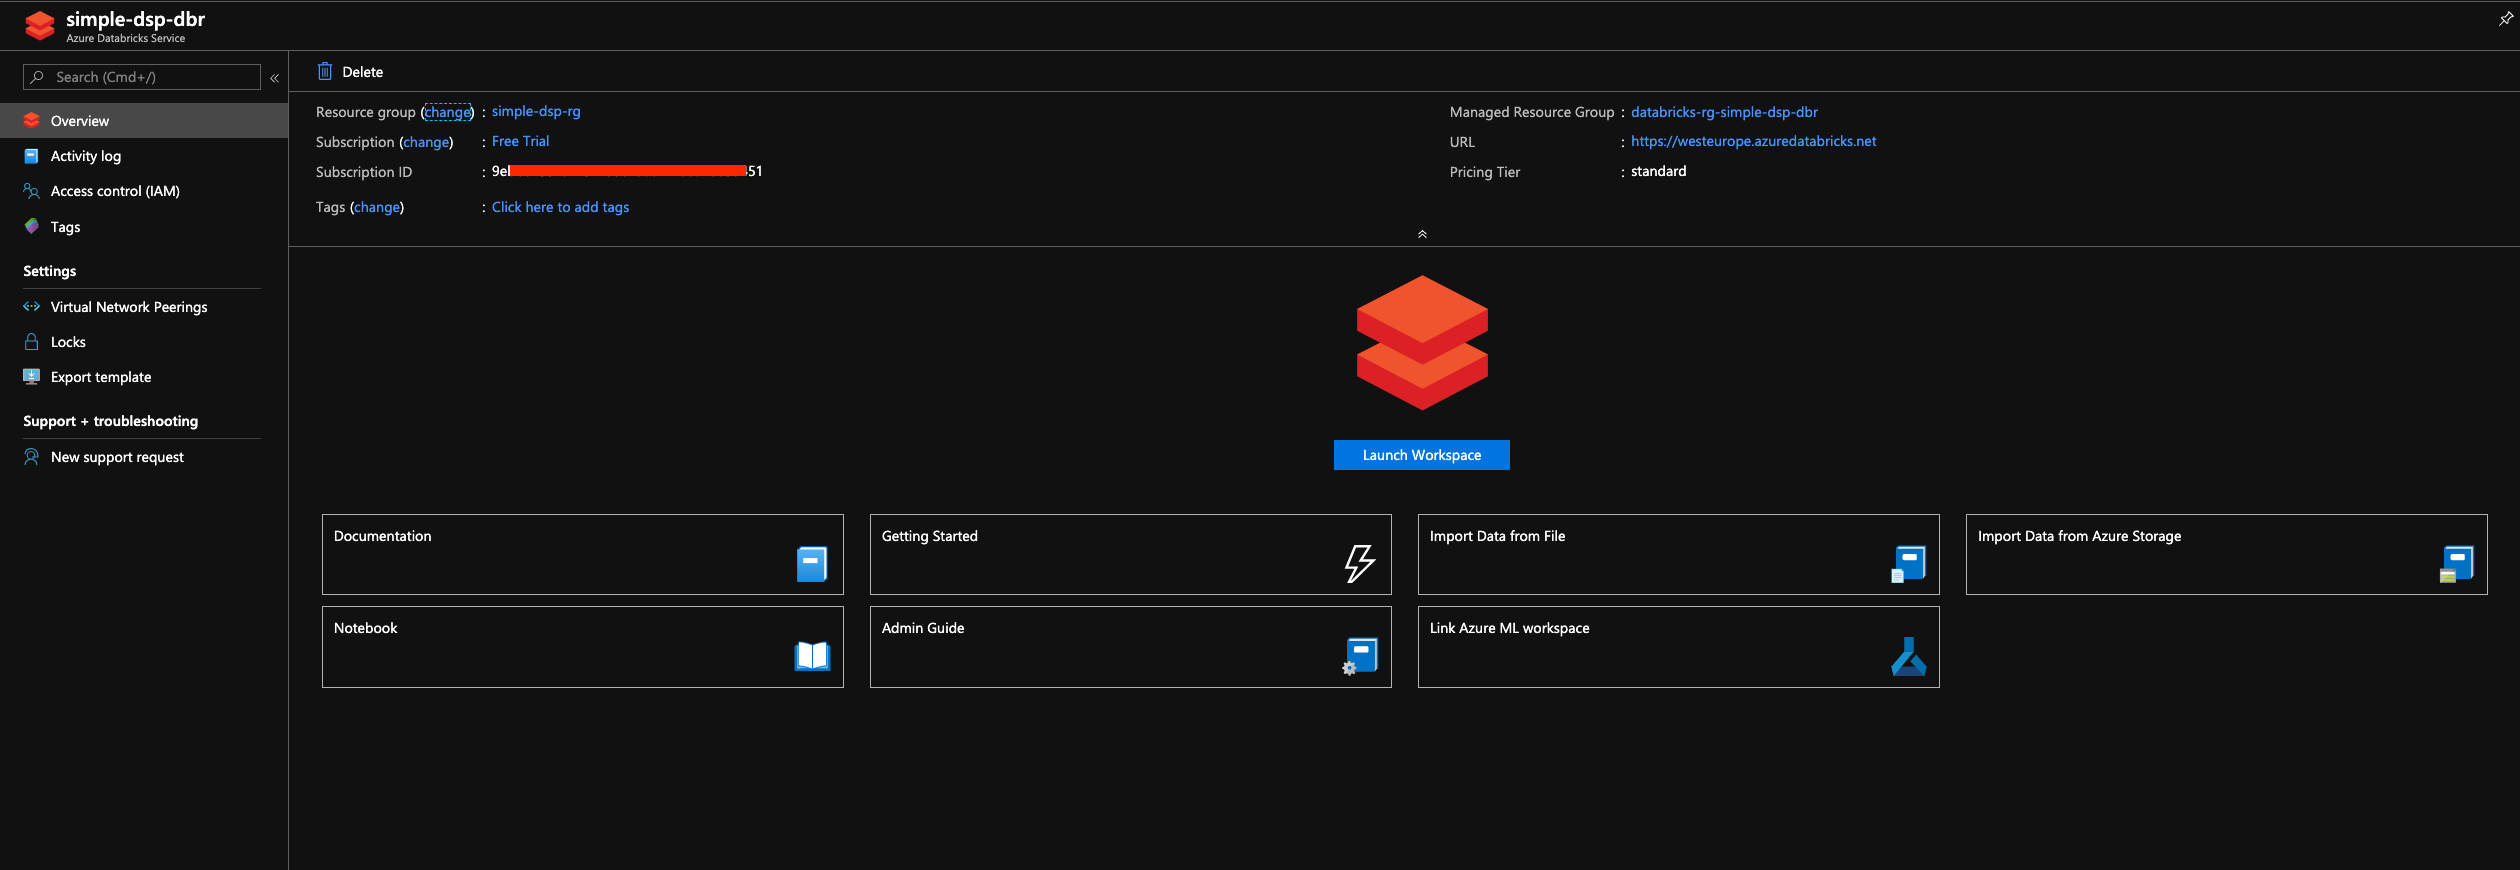
After the workspace opens - go to cluster menu on the left and press “New cluster”.
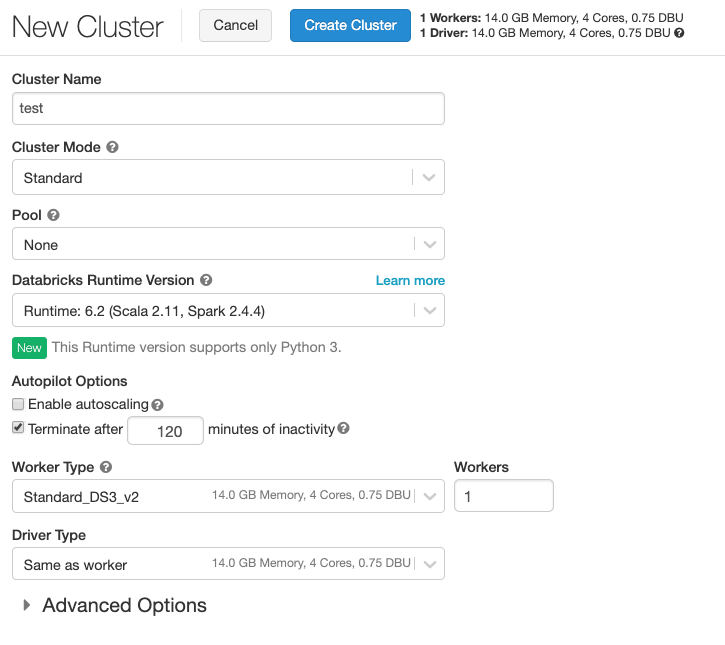
I am using the basic setup with cheapest master and slave nodes. This step requires pay-as-you-go subscription!!!.
After you initiate the creation of the cluster it takes few minutes for it to start. Press home -> create -> notebook and name it.
Once again - there are multiple ways of setting up connection between databricks and data lake - you can read more about it in official Databricks website.
If you have patience and you would like to do everything in the right way from the start - you should look into secrets and how to store and retrieve values from it. We will use the simplest (and super dirty way) option of mounting it using access key found in our storage account -> Access Keys -> Key 1. In the first Databricks cell run:
spark.conf.set("fs.azure.account.key.simpledspstorage.dfs.core.windows.net","STORAGE KEY")
That’s it - your storage is mounted. To read data you can run:
## data - container name
## simpledsptorage - storage account name
df = spark.read.csv("abfss://data.simpledsptorage.dfs.core.windows.net/<file location>")
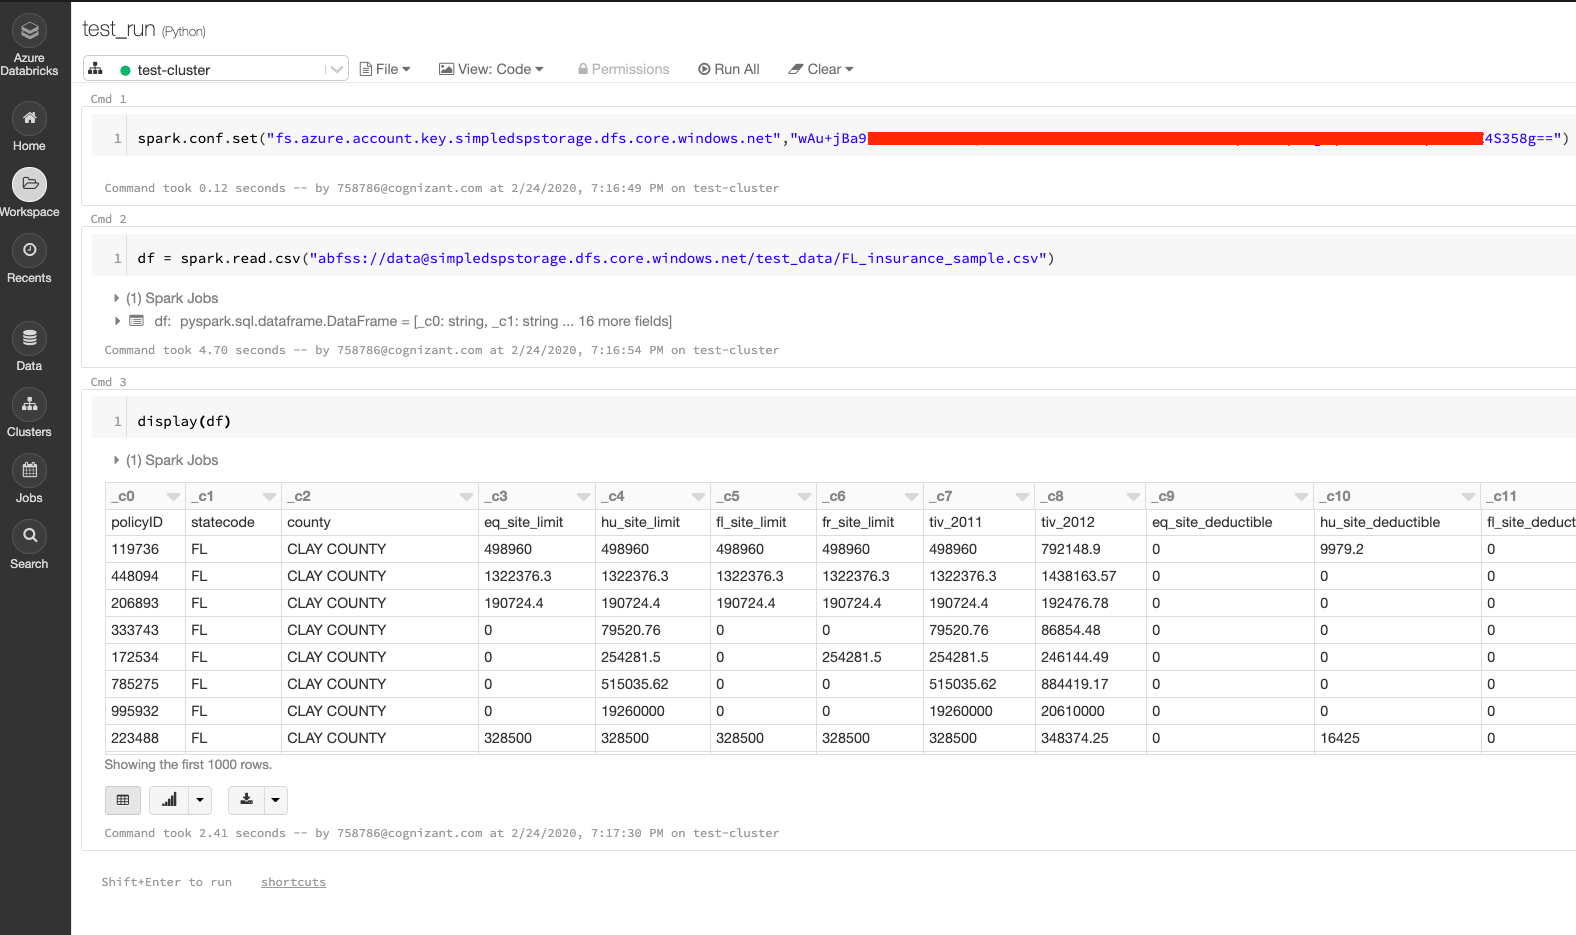
You are now ready to do actual work on Databricks! After you develop few models and a small data ETL, there comes a time for scheduling.
This can be done easy using Azure Data Factory. Go to Data Factory resource and press Author and Monitor.
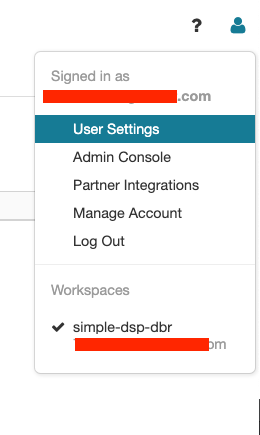
First - we need to retrieve authentication token from Databricks. Find the user icon and press User Settings. From there generate and save the token which will be used in Data Factory.
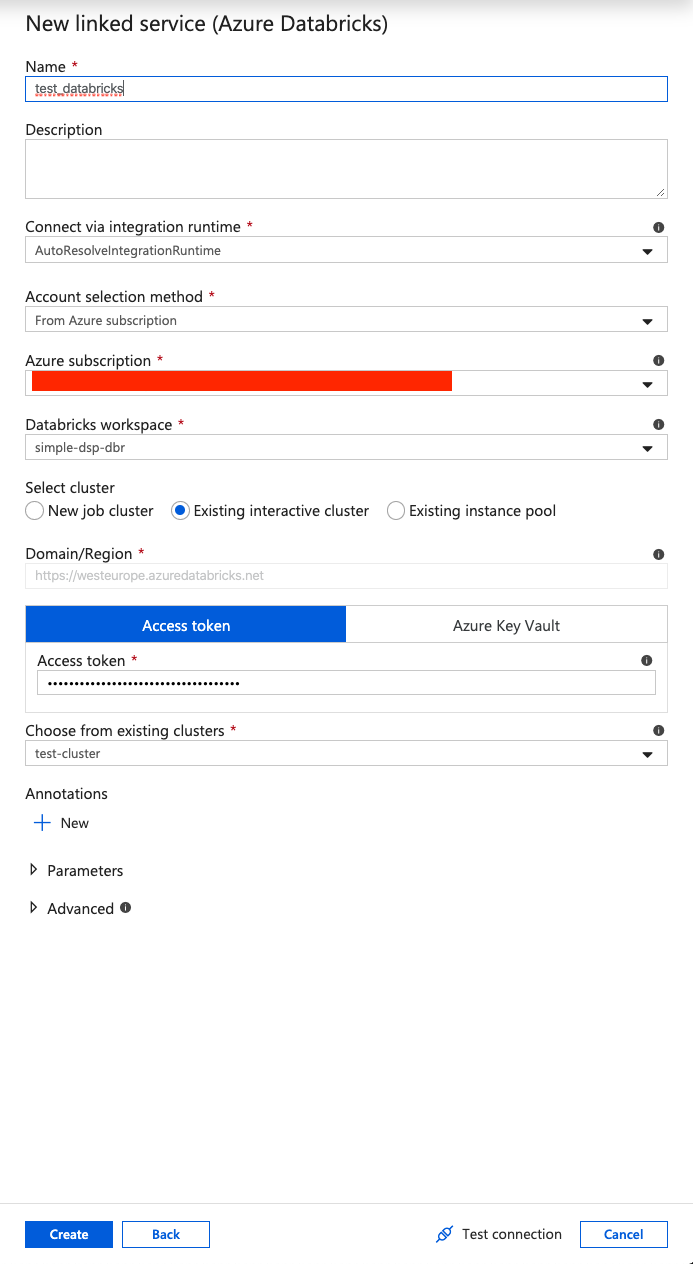
Back on the Data Factory page - go to Author -> Connections -> Linked Services -> New -> Compute -> Databricks. Enter the information and the token, generated in Databricks.
After this it’s time to build the pipeline (only 3 notebooks in our case). You can hook up you github account in order to publish and schedule it. In the image below I ran debug mode which was successfull (indicated by green check marks on the bottom).

Small bonus: production-ice-cream
We recently implemented new Data Science platform to our production environment. Despite having additional components and setup - the overall idea is still the same: make it as much automated and code focused as possible. We are able to redeploy everything within minutes. Example architecture is shown in the picture:
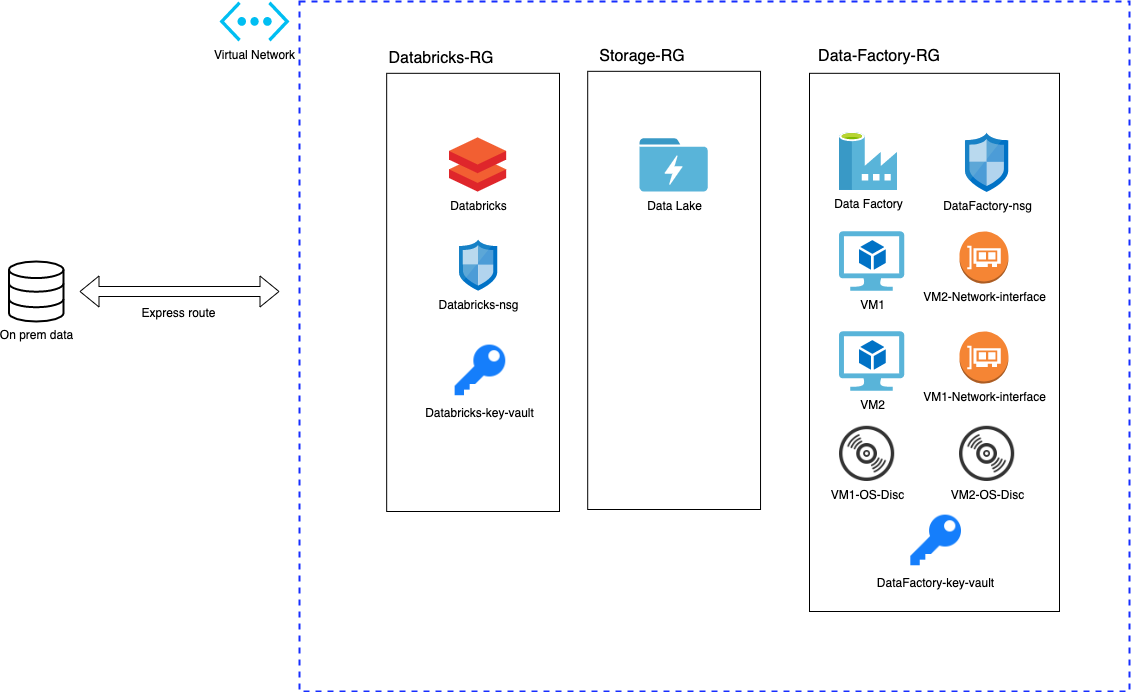
Connection to on-prem data is achieved using express route. Every resource group and component is deployed to virtual network with no public access. We use Data Lake for storage and Databricks for processing power. Additionally we host two virtual machines and install them to our data factory integration run time. This way we achieve high availability and scalability features (more info here).
The end
That’s it for this time! Pat yourself on the back and grab some ice-cream for reaching the end!